How I got my Tier-1 Exceptional Talent UK Visa
On 16th August, 2019, I received the confirmation letter regarding my tier-1 visa endorsement from the UK Home Office:
Download this pdf here
Ever since receiving the Tier-1 visa, I have received numerous messages from people in the tech community applying for this visa asking about the process. I am hence writing this blog to elaborate my visa application story.
Why did I apply for it ?
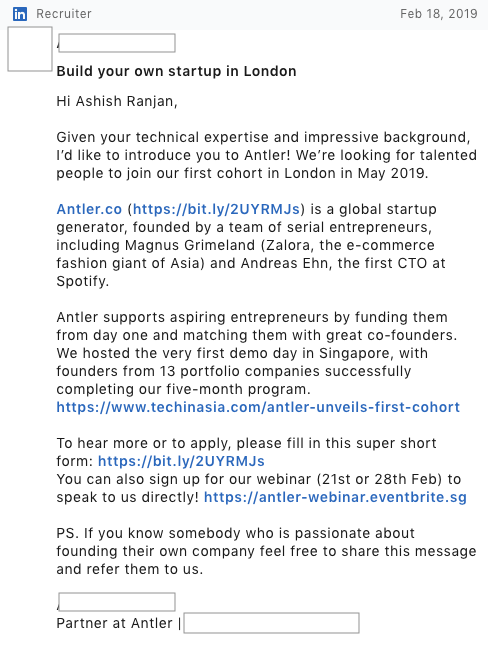
Although this section might not be particularly useful for your visa application process, I will briefly mention why I needed to apply for this visa in the first place. In February, 2019, I received a LinkedIn message from a partner at Antler, which is a well known startup accelerator.

I found this an interesting opportunity and moved the conversation forward. I managed to clear the interviews and was offered to be a founder in their first London-cohort. At the time, I was working in London with a tier-2 general visa. Because this visa is sponsored by an employer, and because Antler is not an employer per se, I needed to switch to a tier-1 visa to be able to function as a founder in their cohort program. This is where my story for applying for a tier-1 visa started. And with the help of consultations from Antler, I started applying for an Exceptional Talent Tier-1 UK Visa.
Visa application overview
Firstly, the clarity of documentation around visa application on the UK Government website is commendable. I highly encourage you to spend hours, even days, reading through all of the related pages on the website. Please also note that the contents on the website have changed significantly from 2019 to 2021, but the core documentation needed for visa application is the same.
Tier 1 visa for talent is granted for various sectors such as art, music, literature, etc. But this blog is focused on an application made for the technology sector. Such applications are handled by a special body in the UK called Tech Nation. If Tech Nation finds your application worthy of granting a visa, they send their endorsement to the Home Office UK. This endorsement is the most important milestone. Once that endorsement letter is granted, the rest of the visa application process is similar to any other visa process, details of which can again be elaborately found on the UK Government website.
To get the endorsement letter from Tech Nation, you need to make an application. In the next and most important section, I will explain that process in detail.
Tech Nation application - deep dive
Tech Nation website provides an extensive explanation of their application process on their visa guide page. To start your application you need to go to the apply page. This will require you to sign up with an email id in order to begin the application process.
You can find below my downloaded pre-filled Tech Nation application form:
Download this pdf here
I have omitted some information for privacy reasons. You can reach me out personally if you want to know any of this information in further details. Secondly, in the application, you need to provide a number of documents as per the document checklist as can be seen in pages 15 and 16 of the above pdf. Below, I am providing the documents in that order:
Download this pdf here
Hopefully this will help you in getting an idea of what kind of documentation and in what levels of detail is that documentation required in this application process.
Plot twist : Tech Nation rejected my application
2 months after I submitted my application, I received an email from the Home Office about the visa. My application was rejected.
Download this pdf here
They also gave me a “Proforma” explaining why I was rejected:
Download this pdf here
Upon reading the explanation, I realised that I have indeed compressed all of my documentations in 1 or 2-pagers and that might be the reason they misunderstood it for me not providing the documentation in sufficient details. I did the compressing under a mistaken understanding that each document in the checklist must be at most 2 pages long, which was not the case.
Tech Nation Endorsement Review
I immediately started looking for a recourse. And as you can see in the rejection email, there is a provision to challenge the decision by requesting an Endorsement Review within 28 days of the decision. Essentially I needed to fill up an Endorsement Review form and email it to the Home Office. You can see my filled form below, which I emailed on 15th July, exactly 28 days after receiving the rejection email:
Download this pdf here
As you can see, I addressed precisely the points of refusal outlined in the Proforma. Having little hopes of getting the decision turned around, I received the email from the Home Office stating that I have been granted the endorsement, as can be seen at the top of this blog.
Closing words
Once I received the endorsement letter, I started the actual visa application. Once again, you can find a detailed explanation of the visa application process on the UK Government website. Both the visa application fee as well as the endorsement fee are quite significant. Additionally you need to pay for a health surcharge for the number of years you want to get this visa for (3 to 5 years). I went with 5 years just to play it safe, although with this visa, you can get an ILR by the end of 3 years (please check if this rule changes with time).
I hope this blog detailing my personal journey of a successful tier-1 visa application will help you in yours in terms of the documentation as well as following the process. Thanks for reading !!
